
Whether we are dealing with a wound on a horse’s leg, trying to bring down swelling, or providing support for a limb, there are a few main rules that we follow for bandage application on horses to ensure proper application and safety for the horse.
When bandaging a limb, there are three main layers:
1) Primary Layer: The role of the primary layer of a bandage is to contact the wound and conduct discharge away from the wound. You may hear about adherent and non-adherent dressing – these are chosen based on the reason for bandaging as well as the type of wound (if present). We most often use non-adherent bandage material, our favourite being Telfa Pads.
Before applying the primary layer, ensure that the leg is clean and dry. The dressing can be applied directly to the wound or following topical medications, if applicable. A loose layer of stretch gauze can be applied over the dressing to ensure it stays put, because as we all know, gravity does not work in our favour when bandaging horse legs.
2) Secondary Layer: The secondary layer is meant for absorption of discharge, application of pressure and support for the limb. We will use either Gamgee or cotton pads for the secondary layer, again based on the purpose of the bandage. If we are dealing with a wound with a lot of discharge, Gamgee is a great product to use as it is nicely padded while providing a lot of absorptive action. If there is no wound, or a wound that does not have a lot of discharge, we can use reusable cotton pads as our secondary layer.
To apply the secondary layer, be sure to start it just below the horse’s coronary band. This will help prevent swelling below the bandage. Begin on the inside or outside of the leg, avoiding placing the edge of the material right on the cannon bone or tendons on the back of the leg. Make sure the material lies flat and smooth to prevent uneven pressure or discomfort (think about making sure your sheets are smooth when making a bed). Pressure should be snug, but not excessive – you want to prevent slipping of the bandage while also preventing disruption of circulation to the limb.
Following the padded layer, stretch gauze is used to hold the padding in place and apply more pressure. Again, you want this layer to be snug without being too constricting. Work from the bottom of the leg upwards, overlapping each round by 50%, ensuring even pressure distribution the whole time.
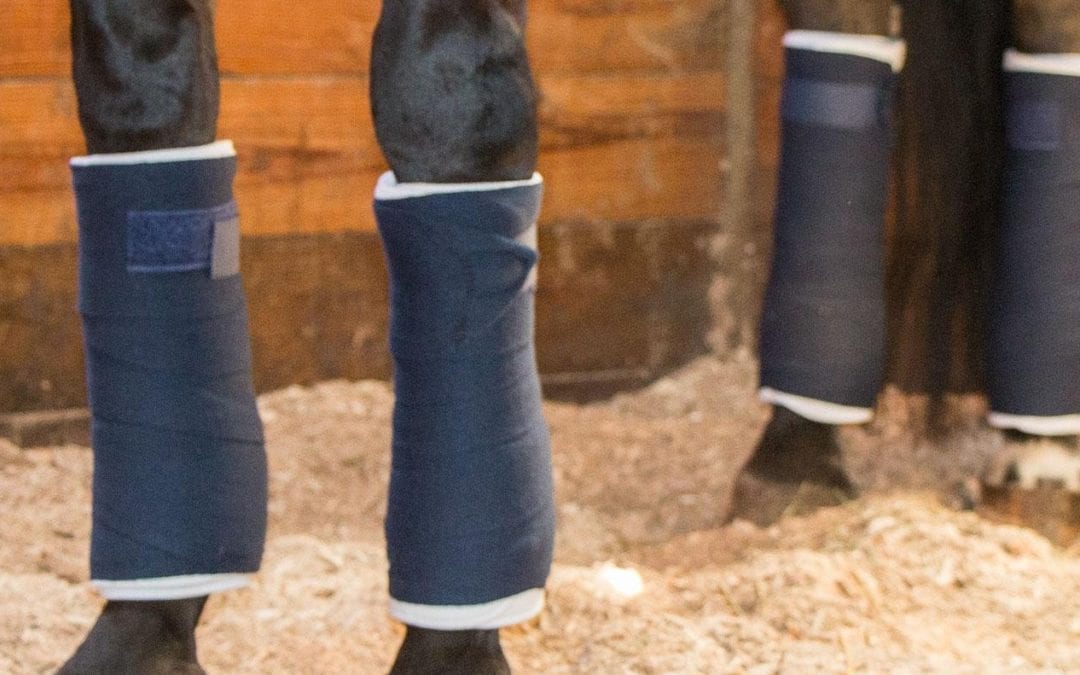
3) Tertiary Layer: The tertiary layer’s job is to provide more pressure, if necessary, and protect the underlying layers of the bandage. For this layer we use Vetrap (or similar self-adherent wraps) or polo wraps. Again, ensure even pressure during application, working from the bottom up with 50% overlap of each round. It is good to leave about 1cm of the underlying padding visible on the top and bottom to prevent a tourniquet effect on either end of the bandage.
Stacked Bandaging: When bandaging the upper limb of a horse, it is necessary to use a stacked bandage. A normal bandage should be applied to the lower limb, and then another bandage applied above that one. If the upper limb is bandaged alone, it can cause stocking up and disruption of the limbs circulation. Stacking the bandage provides even pressure over the entire limb, and that lower bandage will help prevent your upper bandage from slipping.
Bandaging the Hock: If your bandage involves the hock, there is a bit of a different technique involved. A figure 8 pattern should be used around the hock joint to prevent excessive pressure and rubbing on the point of the hock.
Written by Dr. Kristen Wilson
Learn more about Dr. Kristen Wilson here.
")